Sgt Warren Leonard Olson
Tokyo Kempei Tai Headquarters

73rd Bomb Wing Mission #73
Page 2


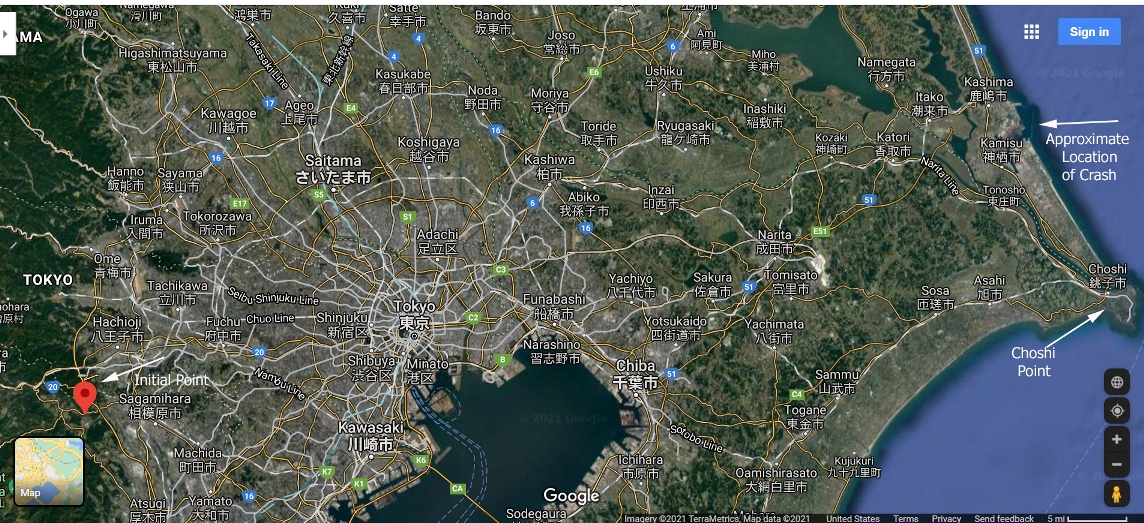
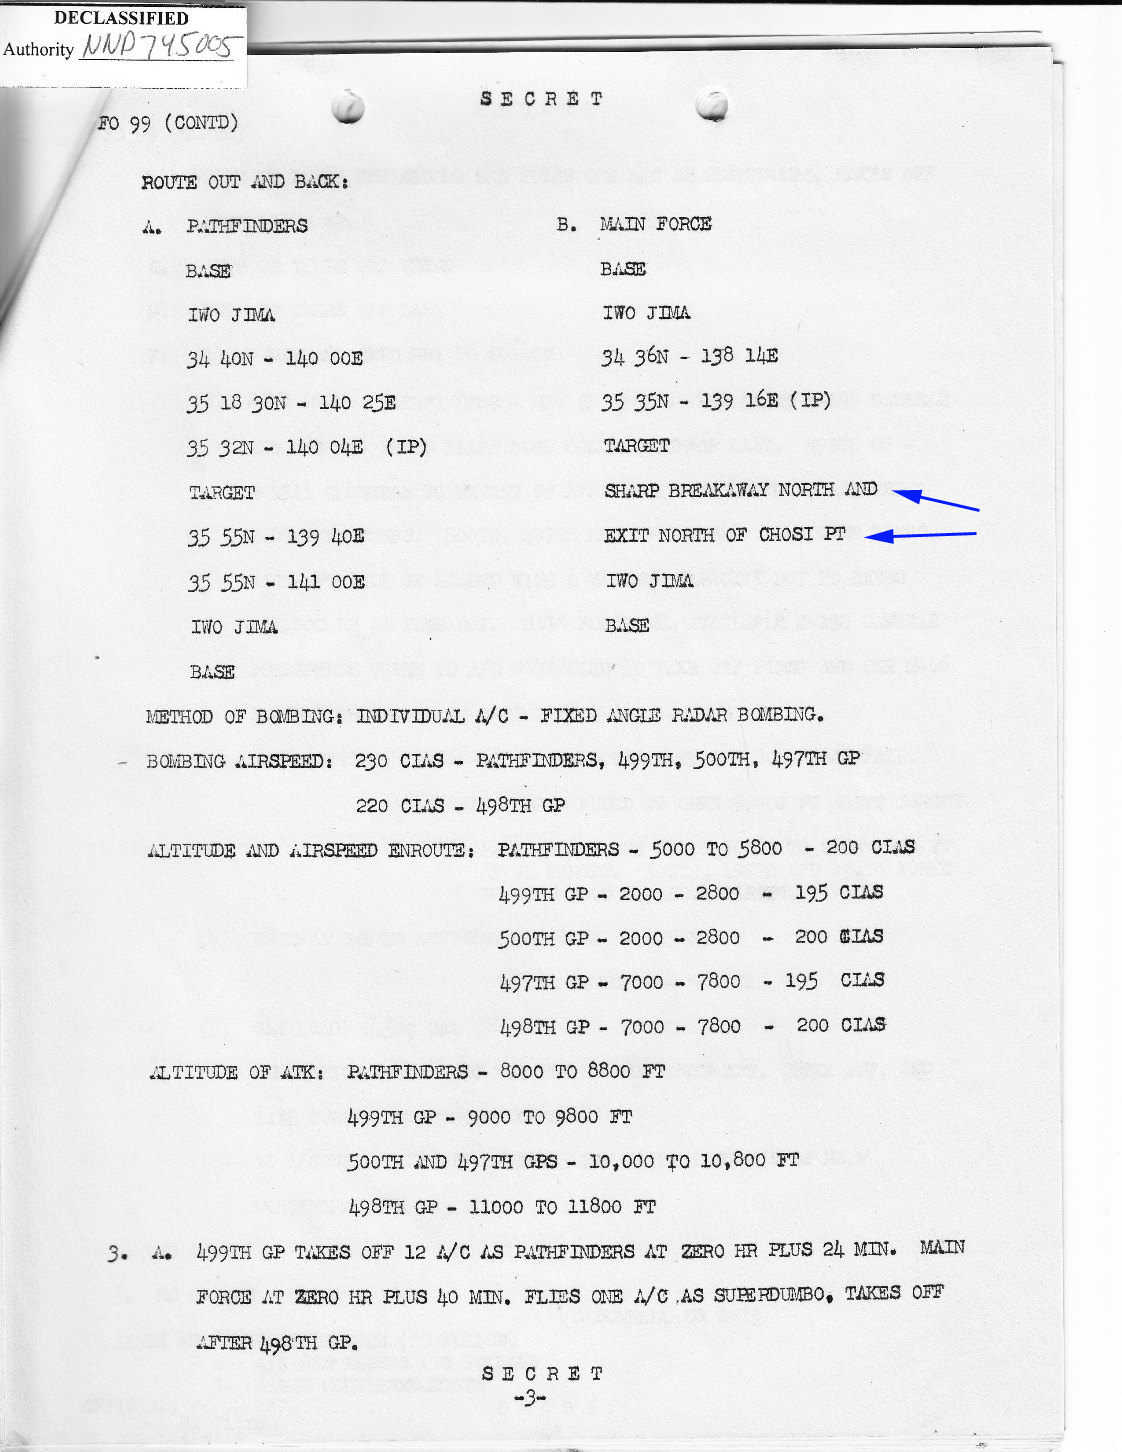
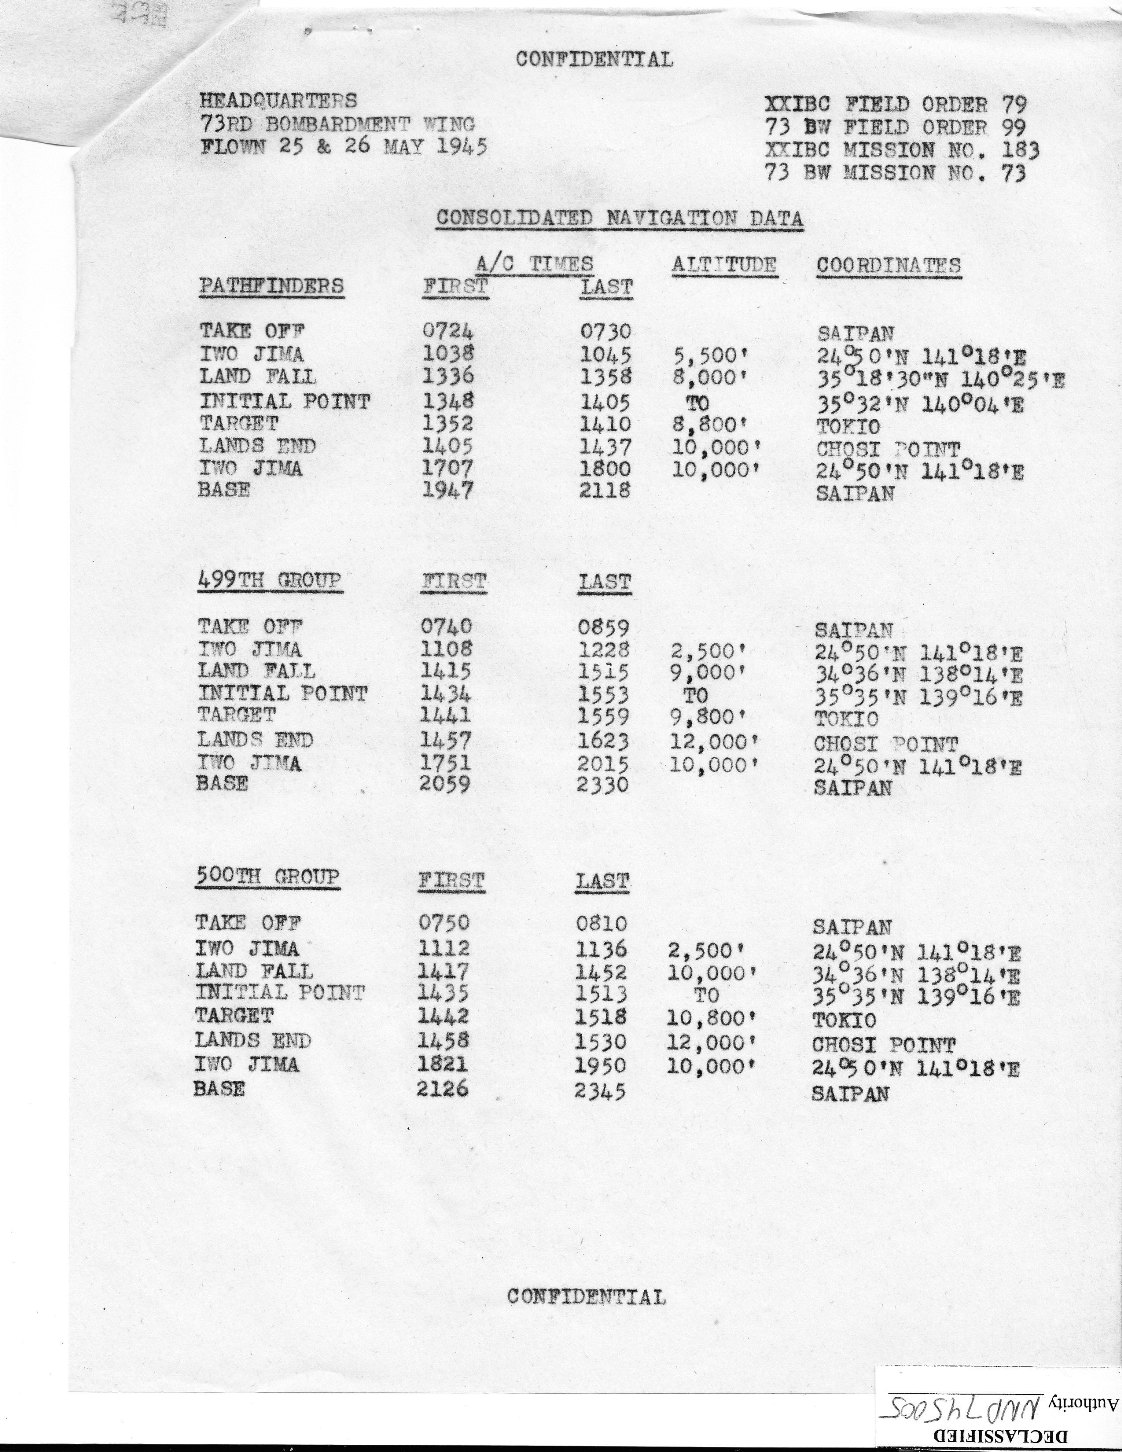
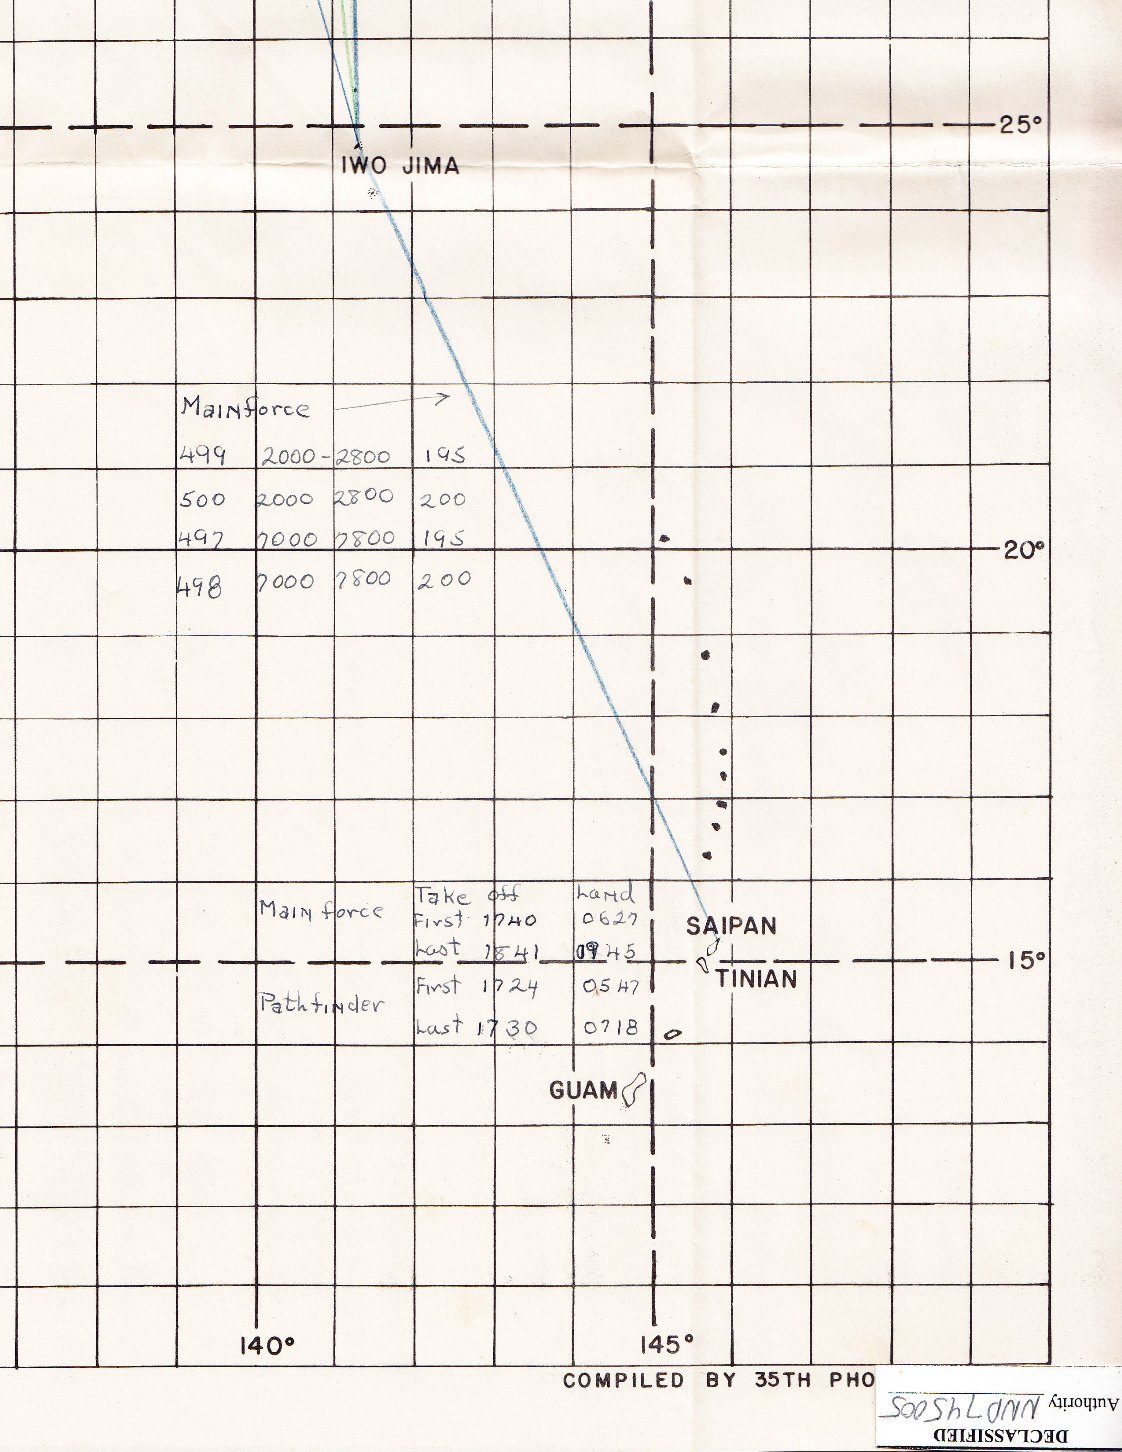
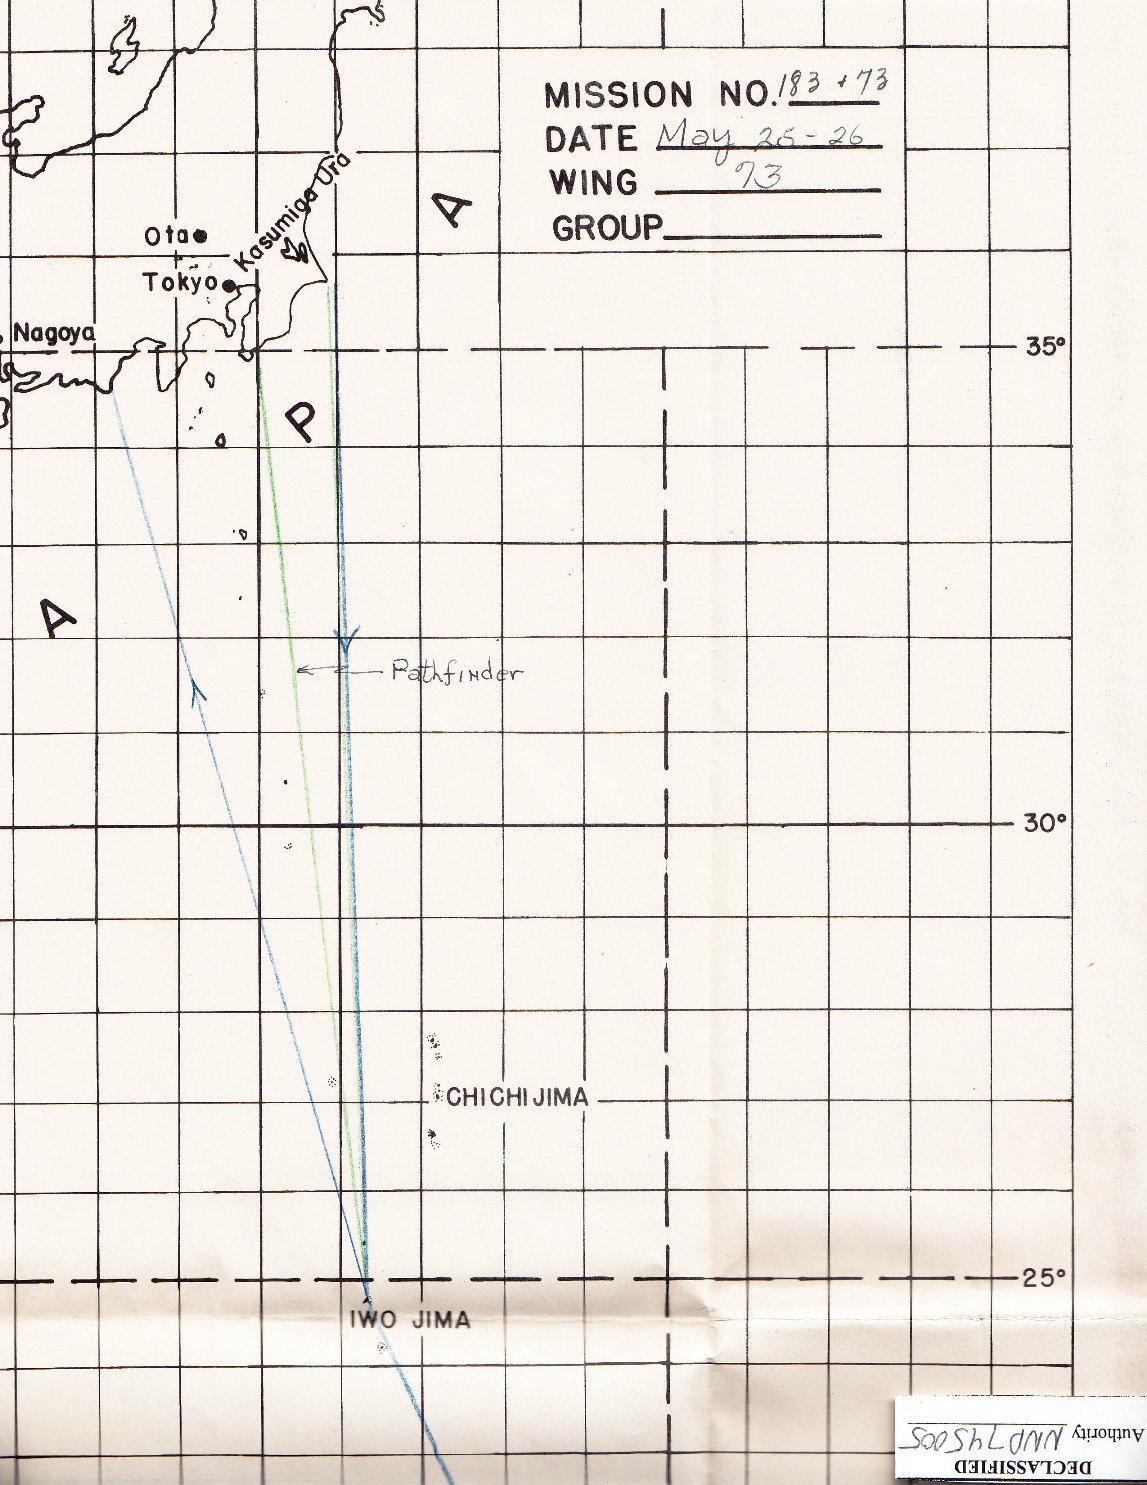
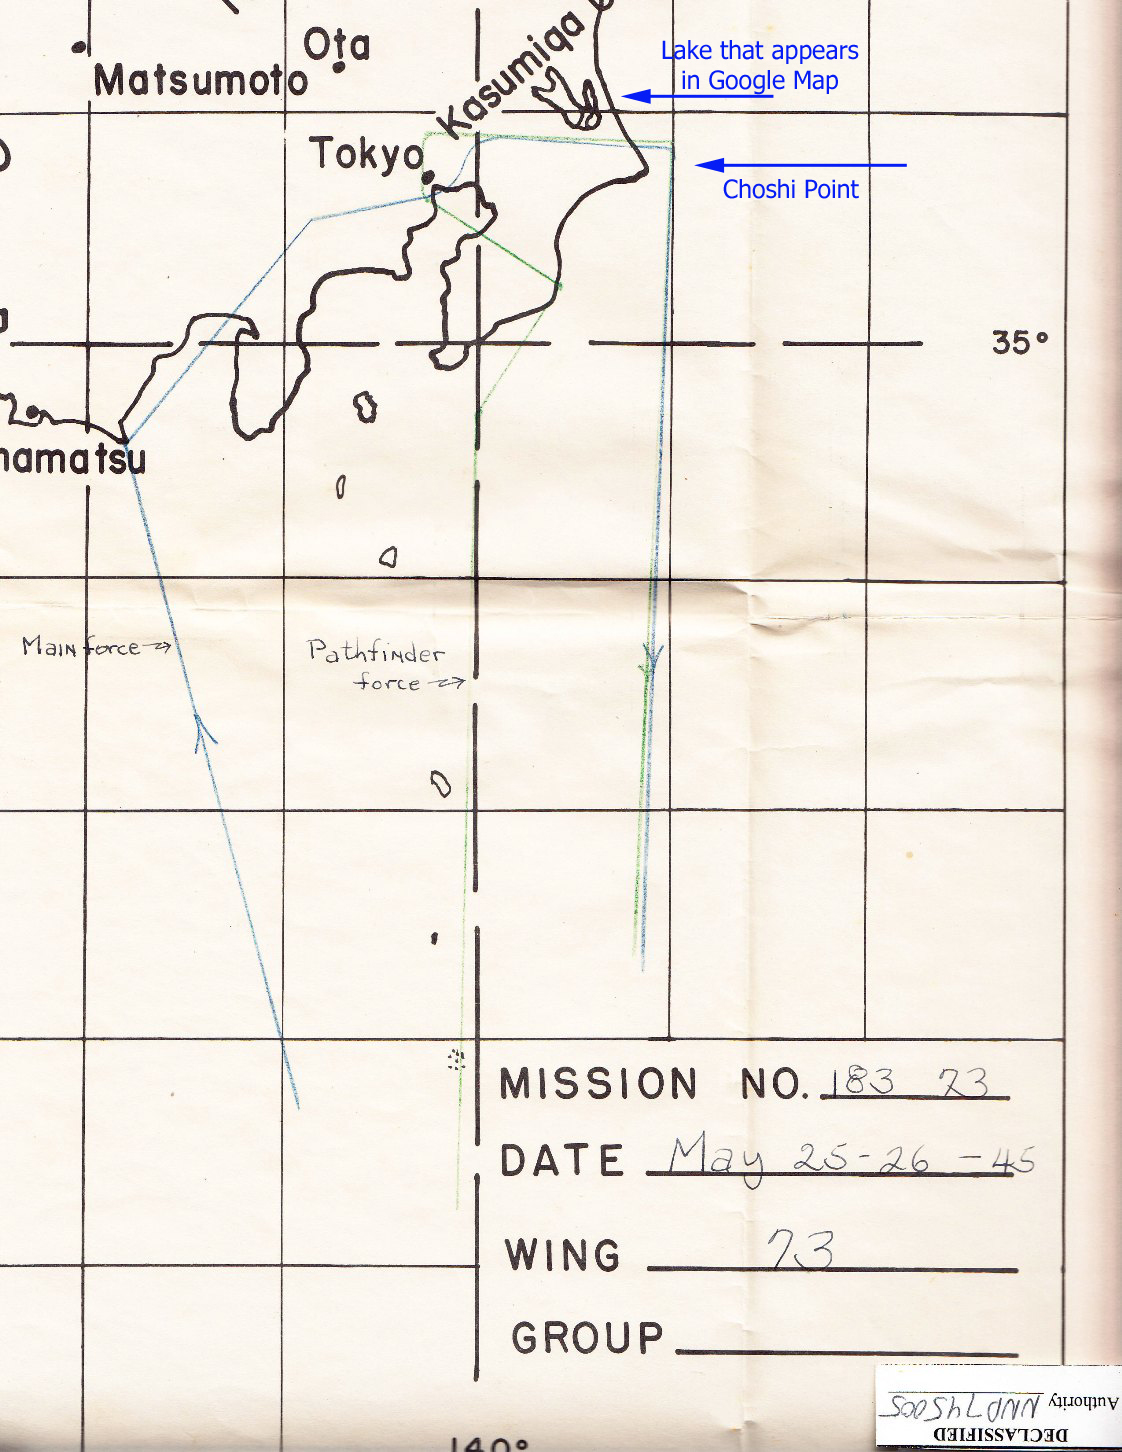
Below the Google Map are two documents with
condensed navigation information for the 499th and 500th Bomb Groups.

Highlighted in the first document are instructions to be followed after releasing bombs.

Additional timing and navigation details are in the second document.

At the bottom of the page is a closeup navigational chart with the routes to be used by
the Pathfinders ( thin, pale green line ) and the Main Force ( thin, pale blue line ).

In this map you will notice that the Pathfinders and the Main Force
approached the target from different angles.

After reaching the target and dropping their bombs,
the aircraft were to follow the instructions in the second document.

As there were 452 B-29s flying this mission,
careful attention to navigation and altitude were critical
to prevent collisions and dropping bombs on other B-29s.


WIDE ANGLE VIEW FROM INITIAL POINT AT FAR LEFT
TO
EXIT POINT AT CHOSHI POINT FAR RIGHT

73RD BOMB WING FIELD ORDER 99
ONE PAGE OF NAVIGATION DETAILS
SAIPAN TO TOKYO AND BACK

source: 73rd Bomb Wing Mission #73 Report
National Archives, College Park Maryland
Jim Bowman

BACK TO TOP

73RD BOMB WING FIELD ORDER 99
CONSOLIDATED NAVIGATION DATA

source: 73rd Bomb Wing Mission #73 Report
National Archives, College Park Maryland
Jim Bowman

BACK TO TOP

NAVIGATION CHART
SAIPAN TO IWO JIMA

source: 73rd Bomb Wing Mission #73 Report
National Archives, College Park Maryland
Jim Bowman

BACK TO TOP

73RD BOMB WING FIELD ORDER 99
NAVIGATION CHART
IWO JIMA TO LAND FALL

source: 73rd Bomb Wing Mission #73 Report
National Archives, College Park Maryland
Jim Bowman

BACK TO TOP

73RD BOMB WING FIELD ORDER 99
NAVIGATION DETAILS APPROACHING AND EXITING TARGET

source: 73rd Bomb Wing Mission #73 Report
National Archives, College Park Maryland
Jim Bowman

BACK TO TOP