1st Lt Harrison K Wittee
Osaka
Shinodayama Military Maneuver Area

73rd Bomb Wing Mission 75
Page 2


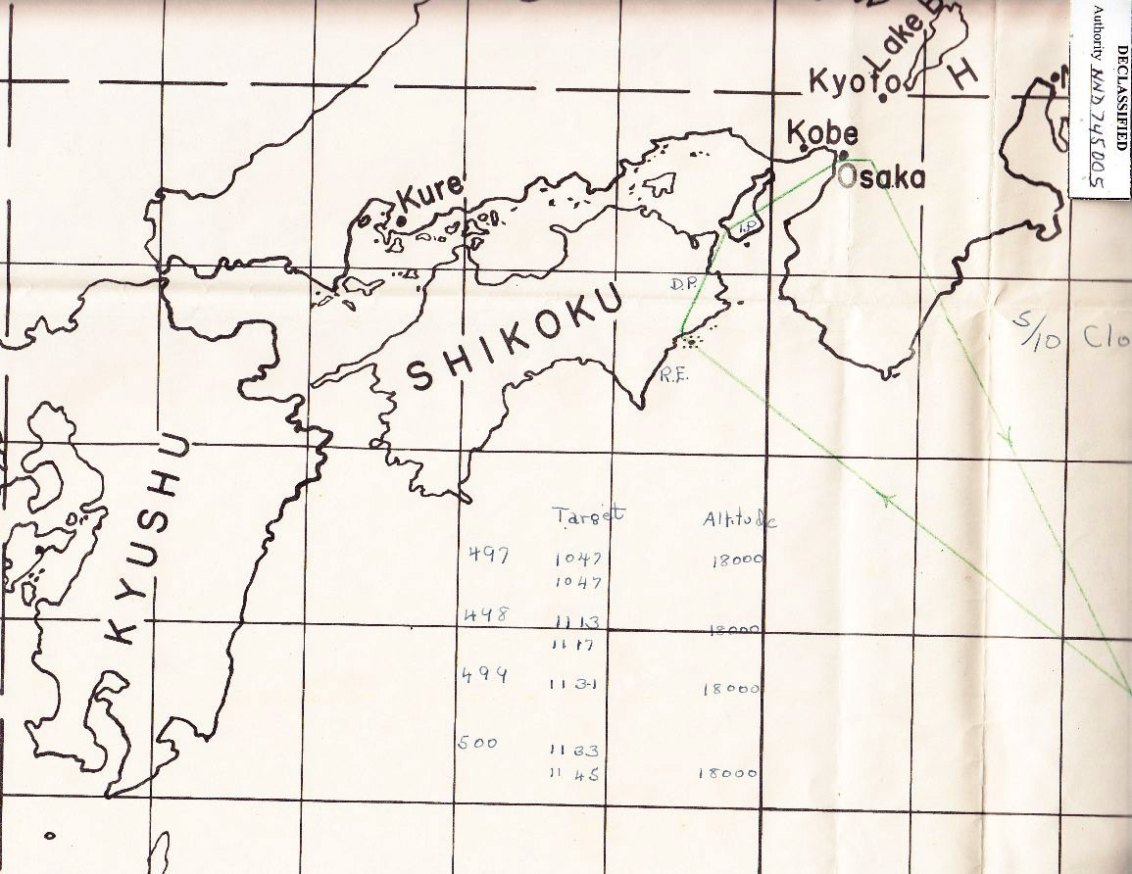
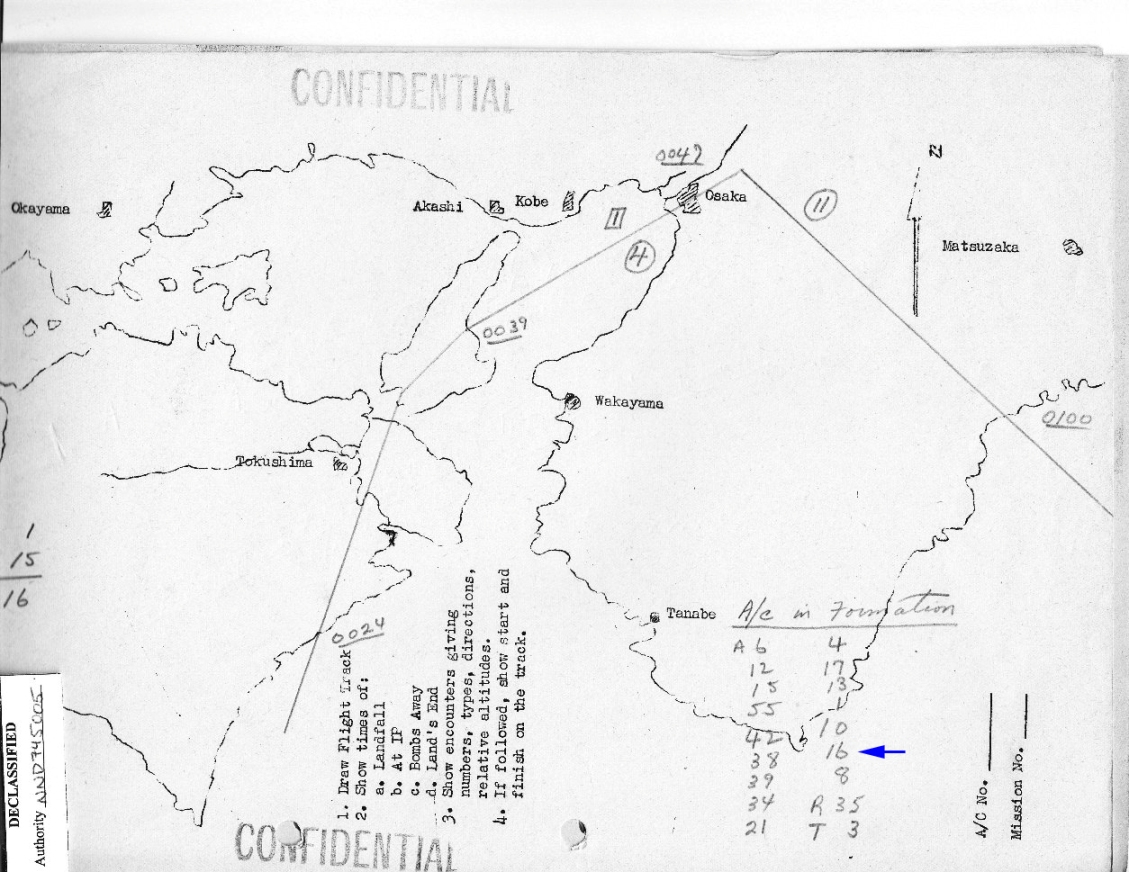
Below are two navigation charts and two diagrams
of the 497th Bomb Group Formation.

The emphasis is on the Crowe Crew in A-16

The first chart shows the track to the coast of Japan,
the right turn towards the target at Osaka, and the exit track.

A closer-in view from the standpoint of the 497th Bomb Group is in the second chart.

There are two B-29s from other Bomb Groups : R-35 and T-3.


At the top of the first formation diagram is a Report of Enemy Opposition.

In the Flak paragraph, A-16 was hit by flak in the #1 engine.

The second formation diagram is a sketch.
At the bottom you can see that some of
the aircraft were separated from the main body.


CHART OF APPROACH TO AND EXIT FROM TARGET
CLOUD COVER IS 5/10

BACK TO TOP

CHART FROM 497TH BOMB GROUP MISSION REPORT
EXIT FROM TARGET IS WHERE
" 11 " APPEARS ON TRACK

BACK TO TOP

PAGE FROM 73RD BOMB WING MISSION REPORT
ENEMY OPPOSITION
FLAK
ARROW POINTS TO A-16
B-29 FLOWN BY LT CROWE

FORMATION IS AT BOTTOM

BACK TO TOP

FORMATION DIAGRAM
497TH BOMB GROUP MISSION REPORT

BACK TO TOP