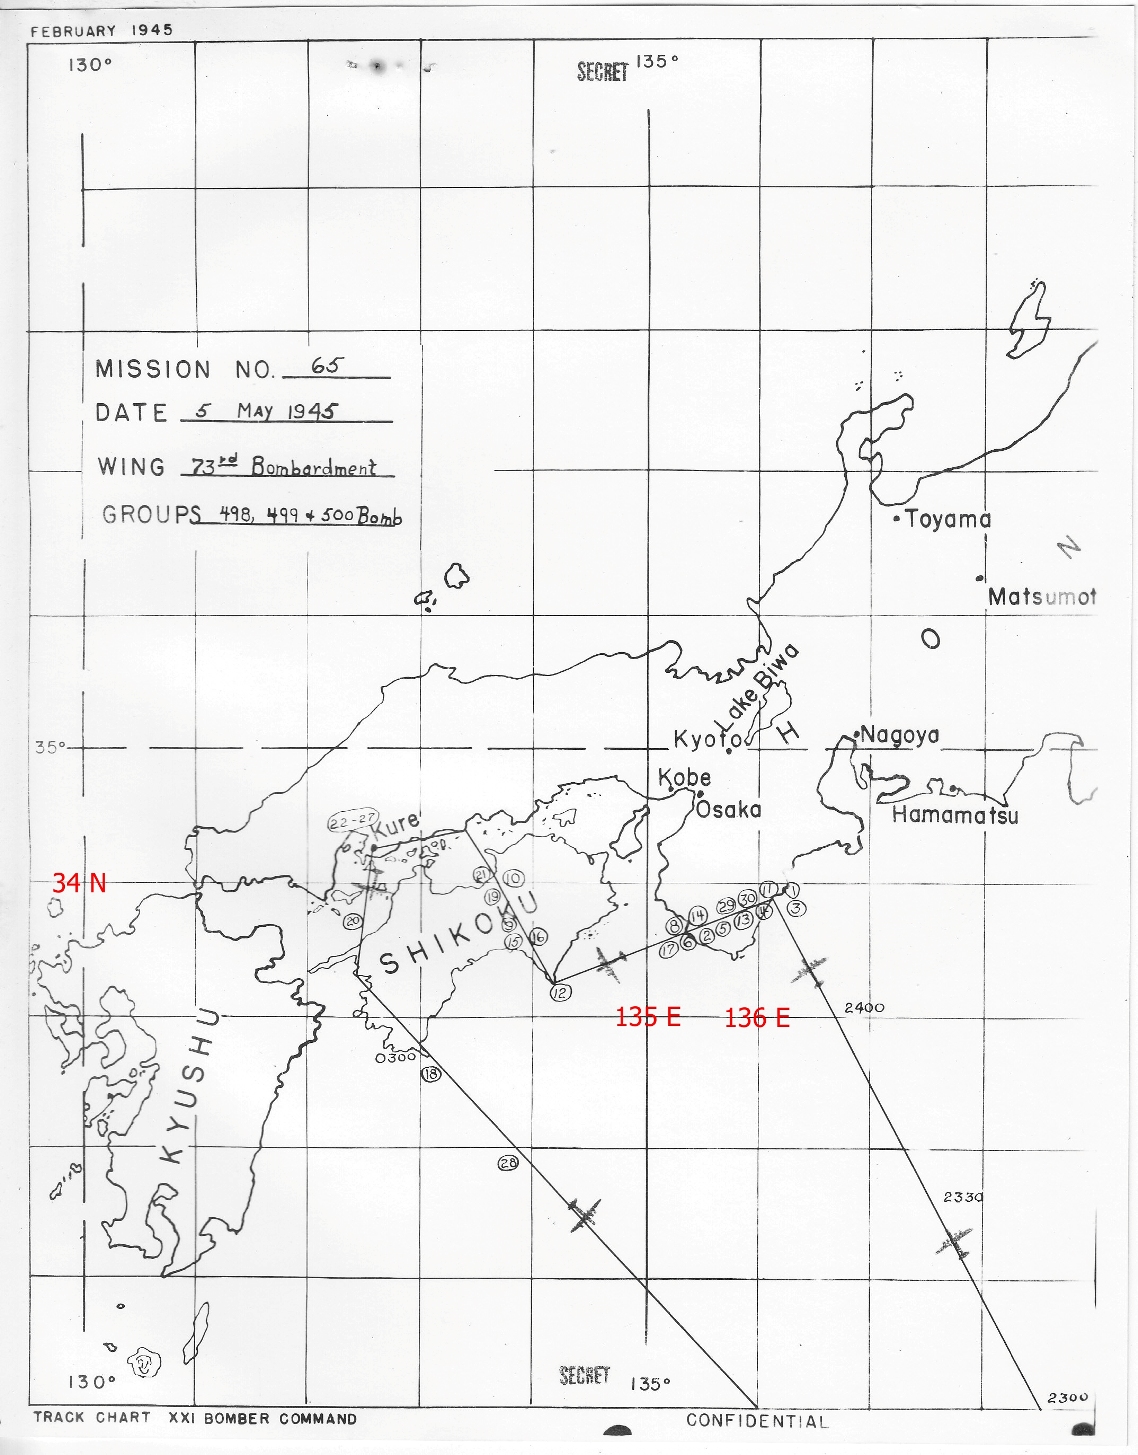
The first chart shows the route to the target flown by
the 498th, 499th, 500th Bomb Groups.
The 497th ran into some problems in the
vicinity of numbers 1 and 3 in this chart.
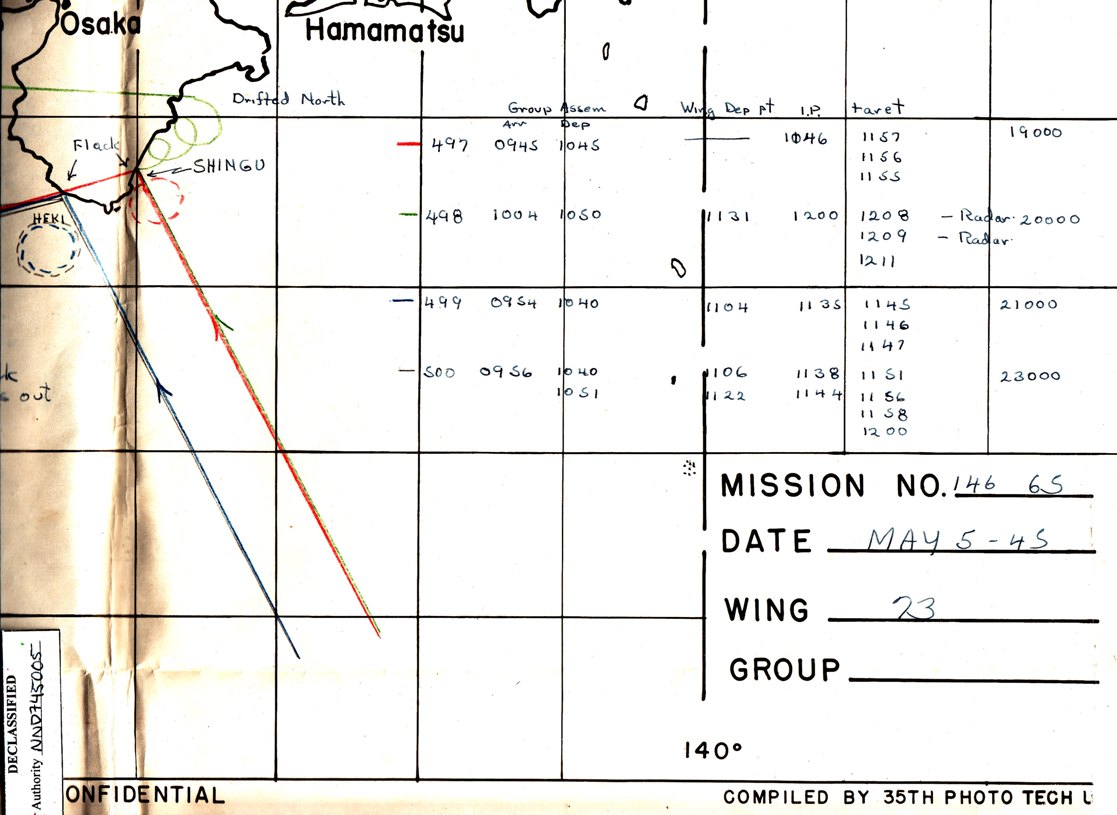
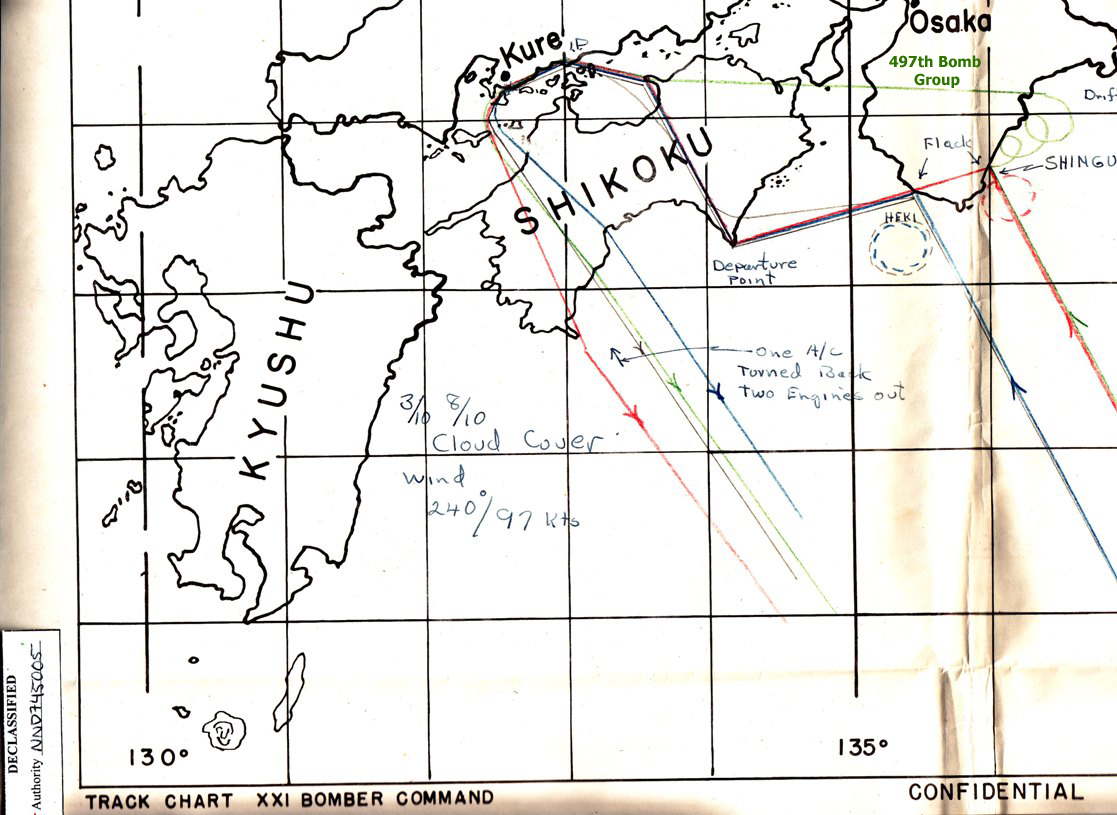
In the next two charts, the caption for
the green track is actually the 497th
Bomb Group.

Within both the 73rd Bomb Wing and 497th Bomb Group Mission reports
are several documents hinting at what took place.
Col Arnold Johnson, 497th Bomb Group Commander, flying as Mission
Commander,
was in the lead B-29 with Capt. Geyer as Aircraft Commander.
Their B-29 landed at Iwo Jima and within reports are the words:
' the Group Commander is on Iwo Jima and
the reasons for why this happened are not known '
The 30 B-29s took off from Saipan over a 15 minute time frame.
Assembly, which should have taken 15 minutes, took over an hour.
The decision was made not to fly the route that
the other Groups took but instead fly directly to the target.
This is seen most clearly in the third chart from the top.
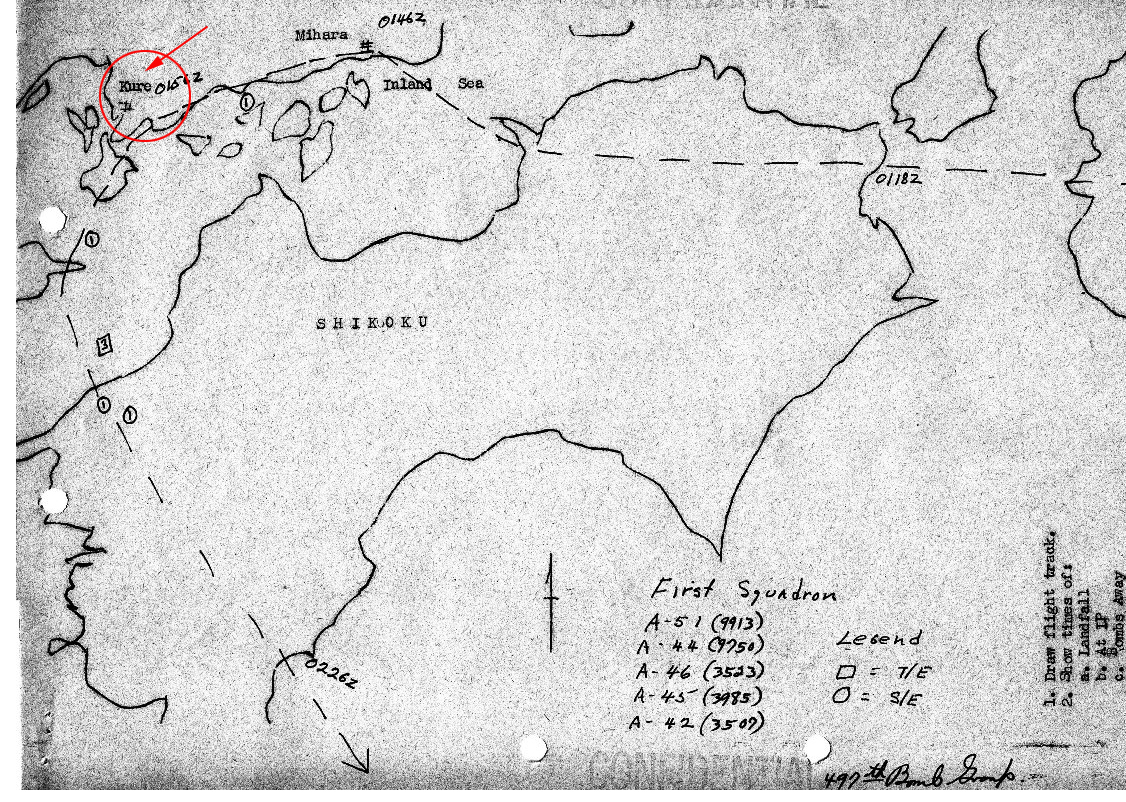
The two sketches are from the 497th Bomb Group Mission Report and
show the track flown by the 871st Bomb Squadron.
The second chart shows where Lt McSpadden's B-29 was attacked by
Japanese aircraft
and
where his B-29 crashed roughly 50 miles South East of Osaka.