Sgt Charles Richard Weiser
Ongata Village
Missing Air Crew Report 12500
Page 2


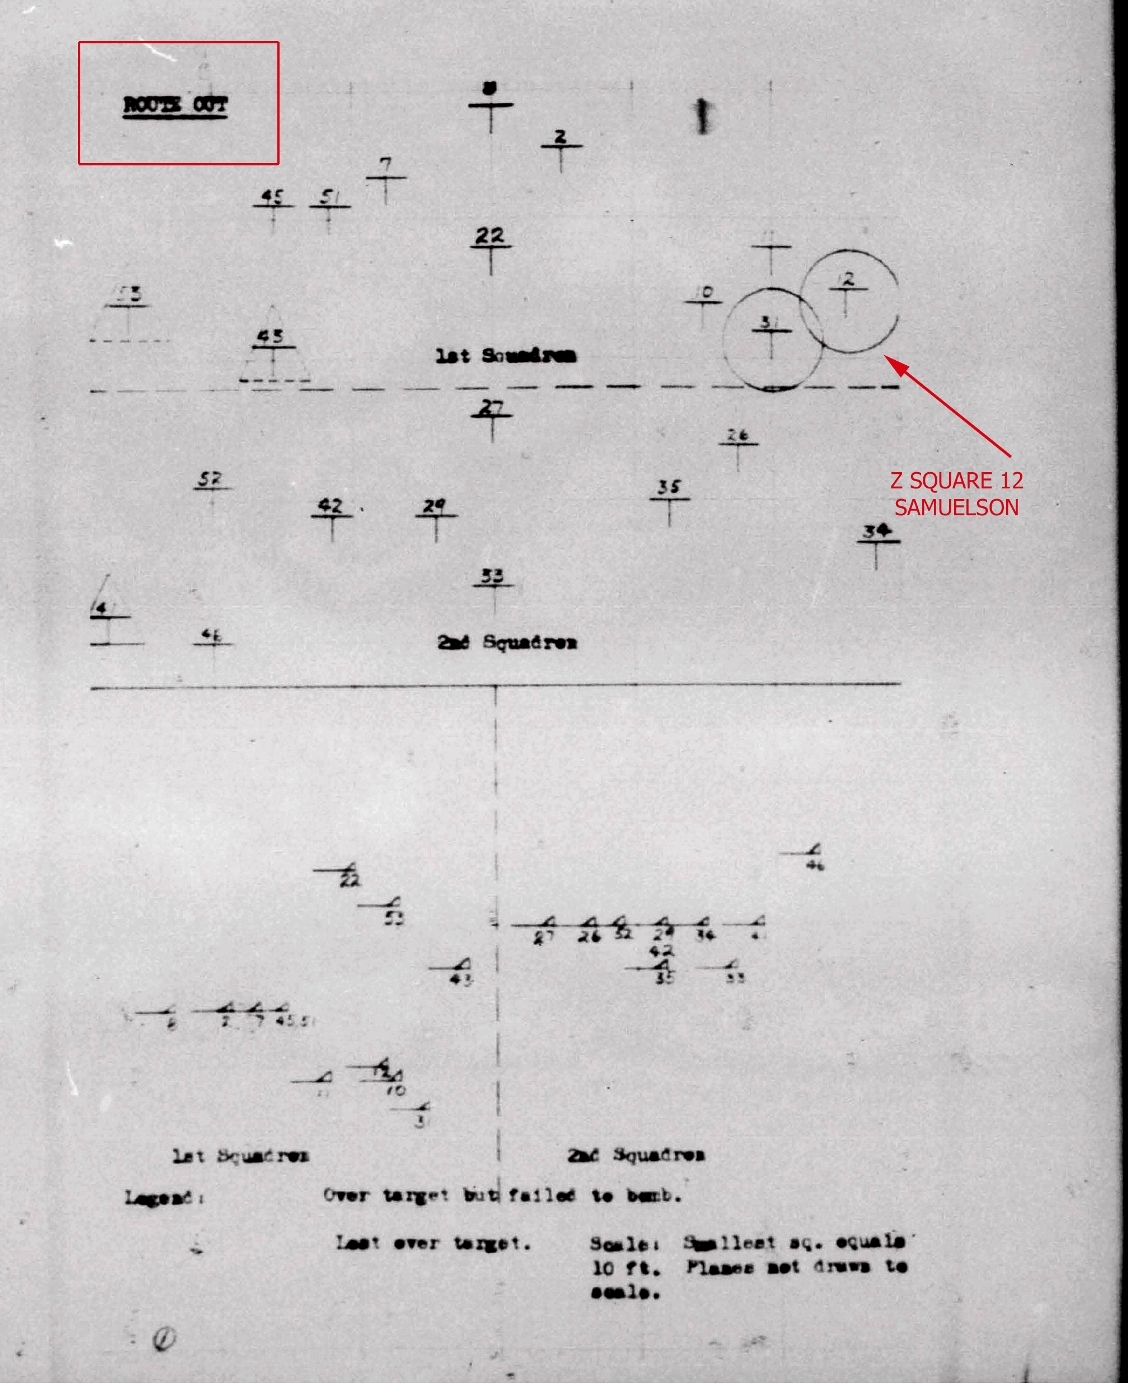
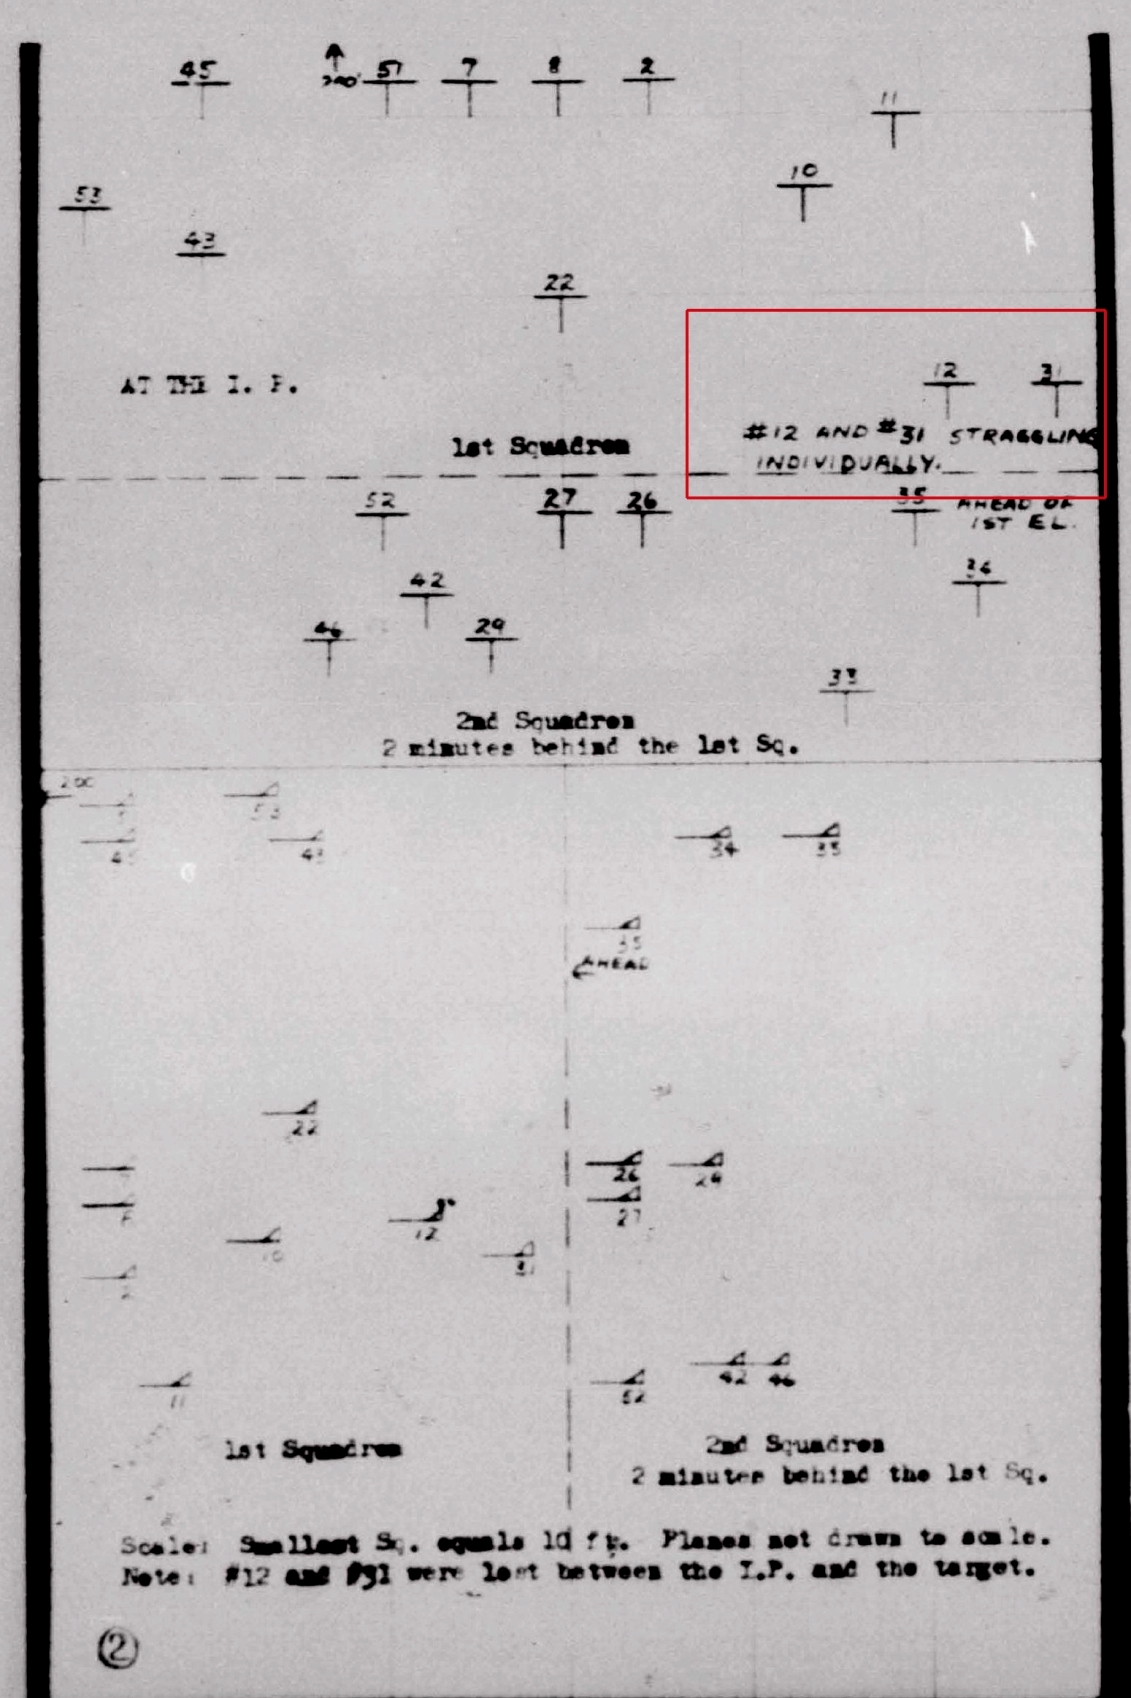
At the top of this page are two formation diagrams.

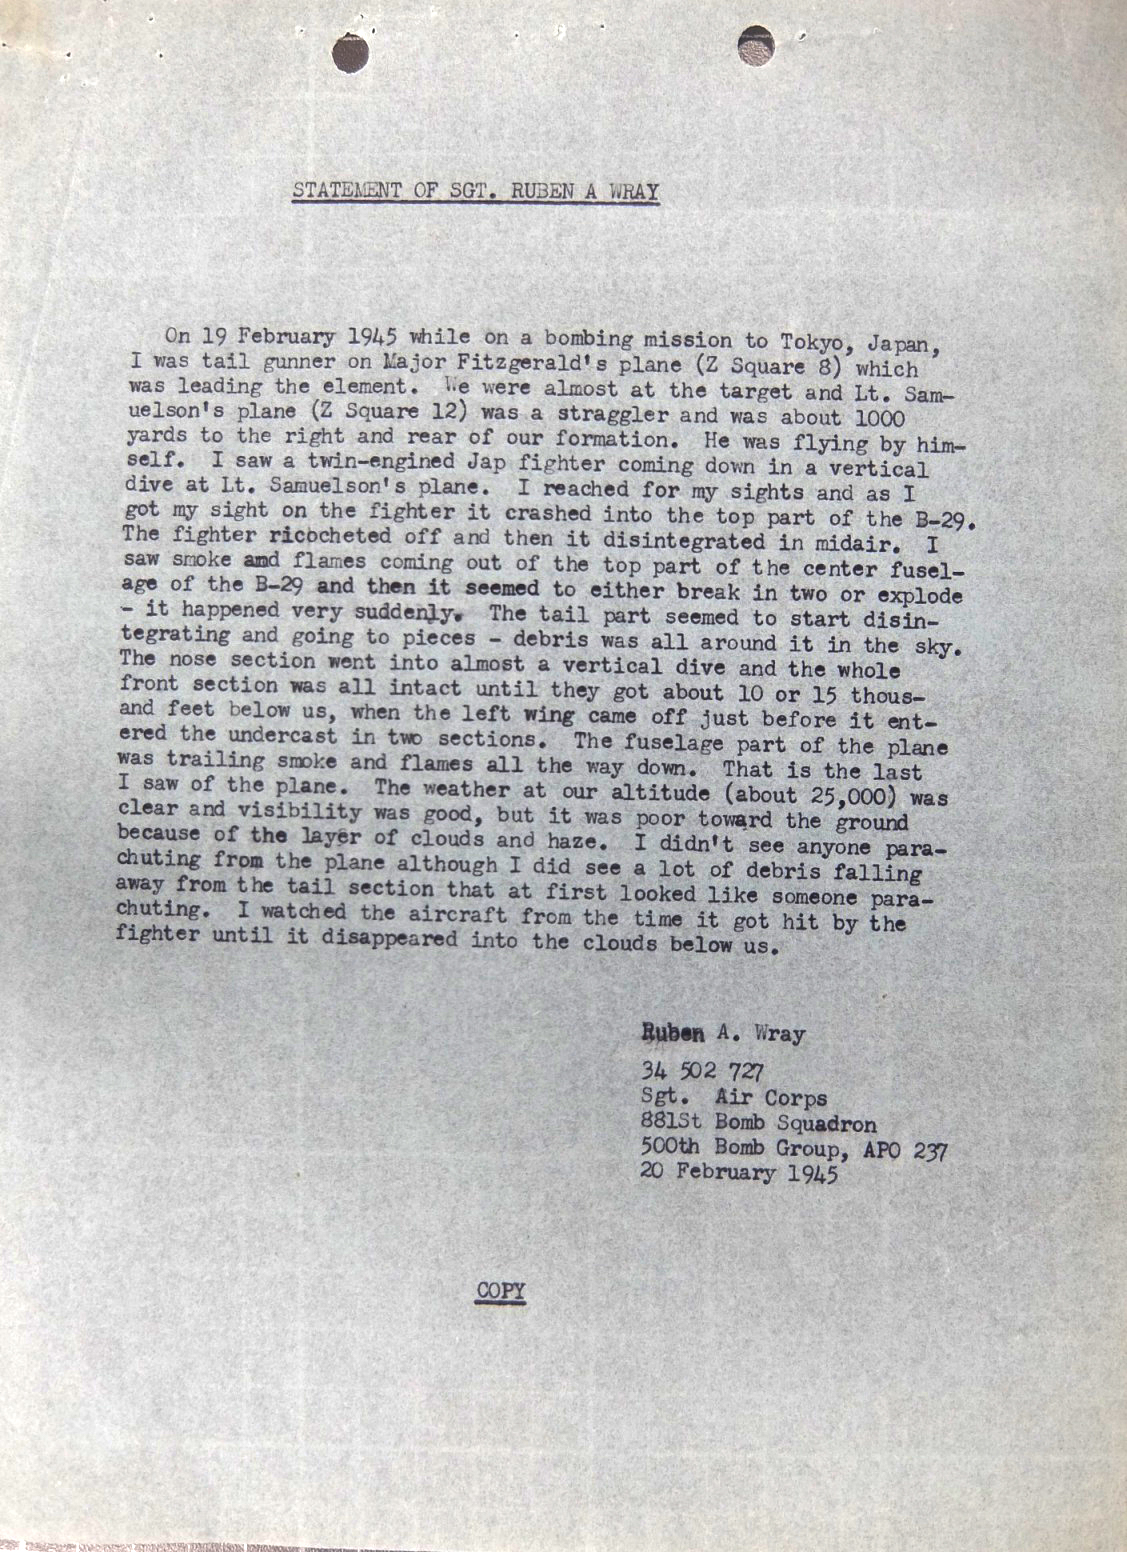
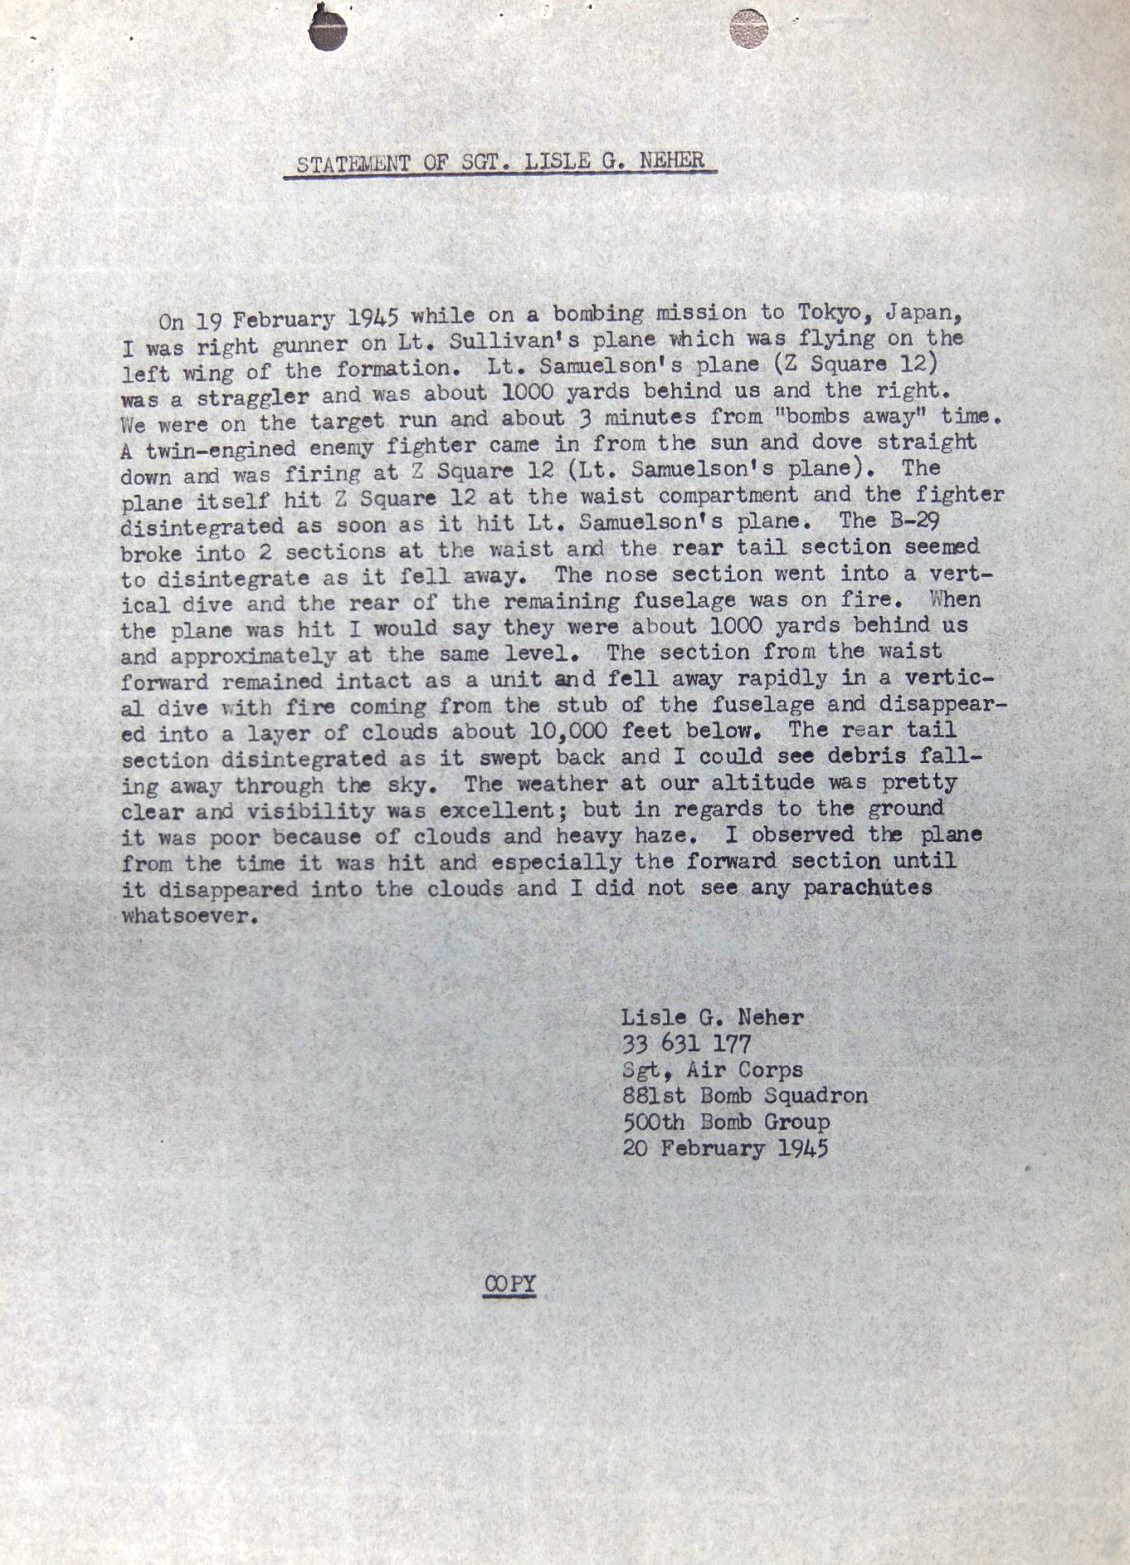
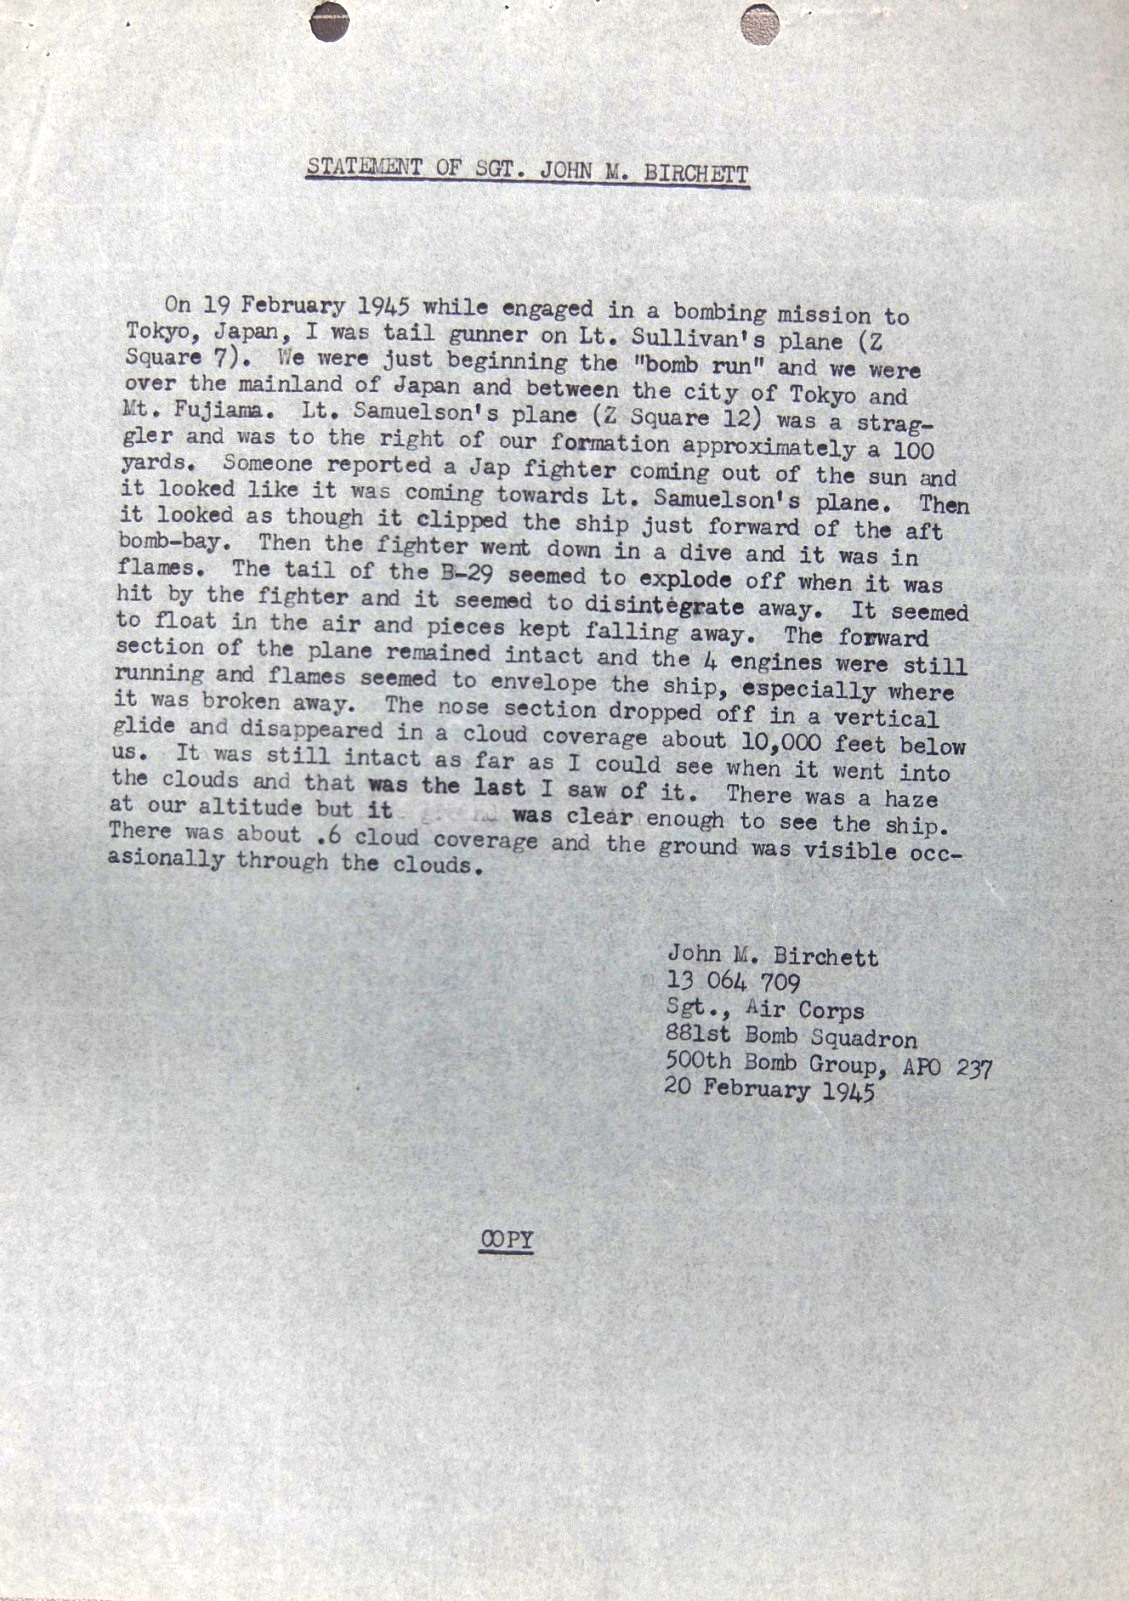
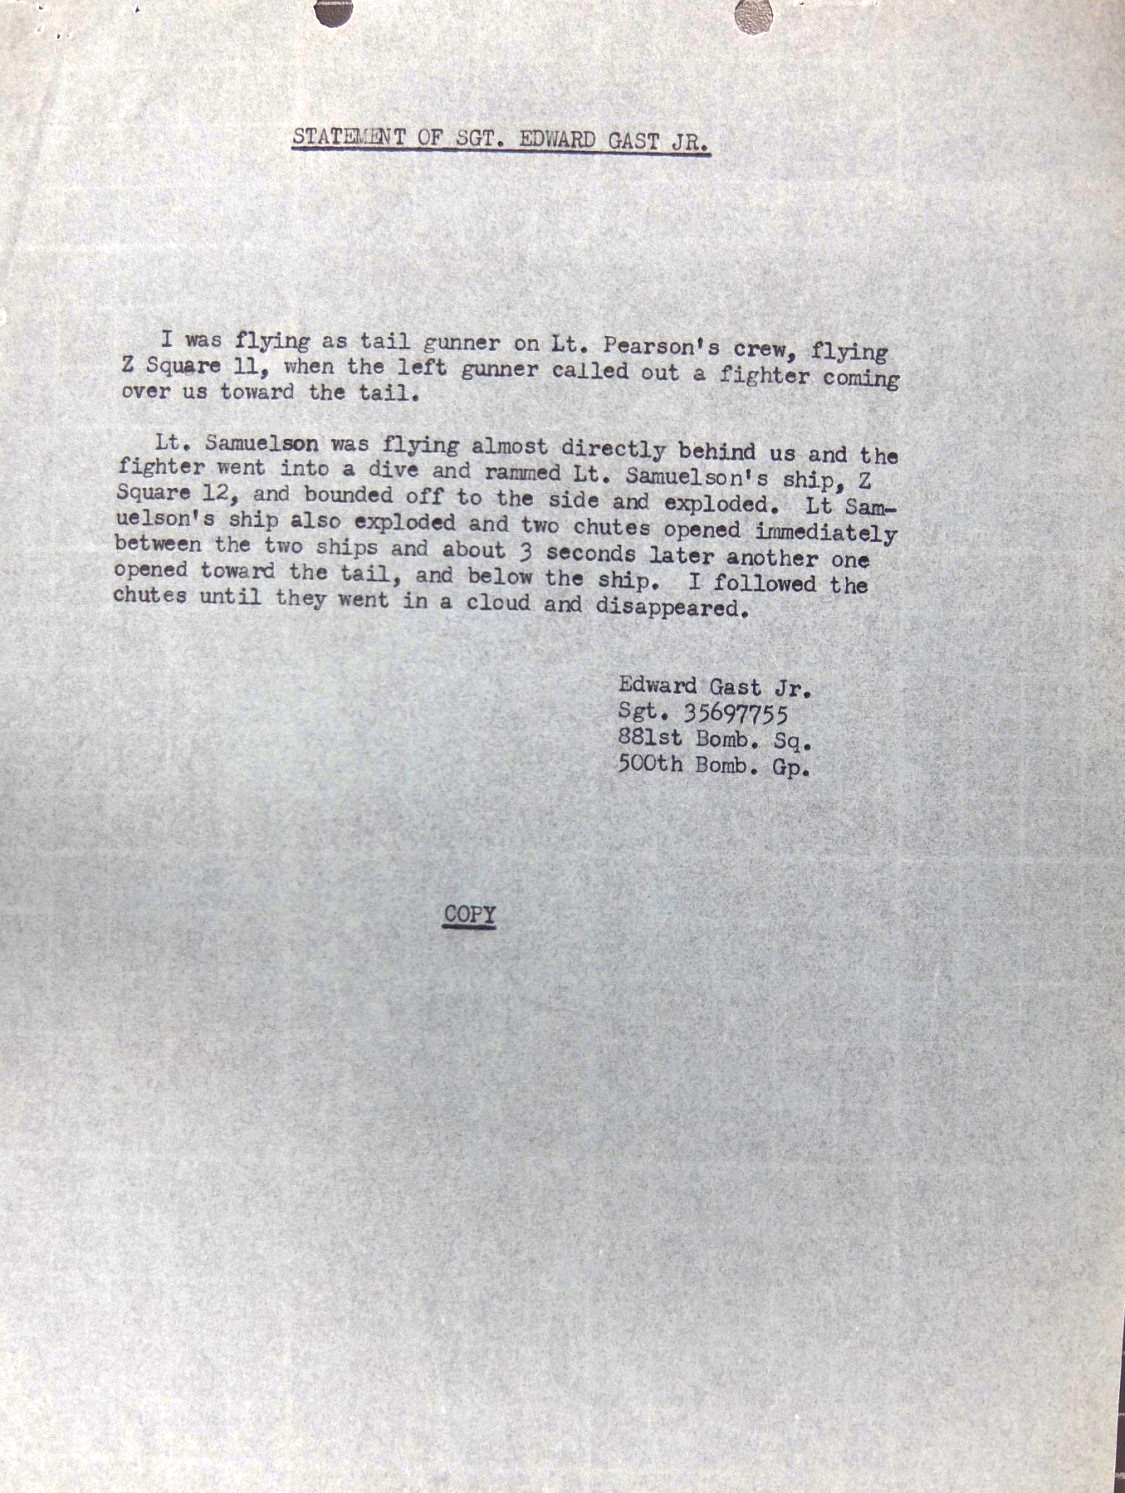
Next are four statements from crew members from
other B-29s who witnessed what happened to Z Square 12.


Their statements are similar but each has information not in the others.

Within the MACR there is no mention of
the coordinates where Capt Samuelson's B-29 was rammed.

A resonable explantation is that the B-29s were
under attacks from multiple fighters.
Their attention was focused on shooting down
these enemy aircraft.

The first formation is the Route Out with Z-12 in the correct location.

The second formation is between
the Initial Point at Kofu and the Secondary Target.

Capt Samuelson in Z-12 and Z-31 were not
keeping up with the rest of the B-29s.

BACK TO TOP


FORMATION DIAGRAM
ROUTE OUT


source: Air Force Historical Research Agency
REEL B0668

FORMATION DIAGRAM
BETWEEN THE INITIAL POINT ( KOFU )
AND THE SECONDARY TARGET ( TOKYO DOCK AREA )


source: Air Force Historical Research Agency
REEL B0668

BACK TO TOP

STATEMENT OF SGT RUBEN A WRAY


BACK TO TOP

STATEMENT OF SGT LISLE G NEHER


BACK TO TOP

STATEMENT OF SGT JOHN M BIRCHETT


BACK TO TOP

STATEMENT OF SGT EDWARD GAST JR.


BACK TO TOP