Below are pages are from the
Consolidated Mission Report
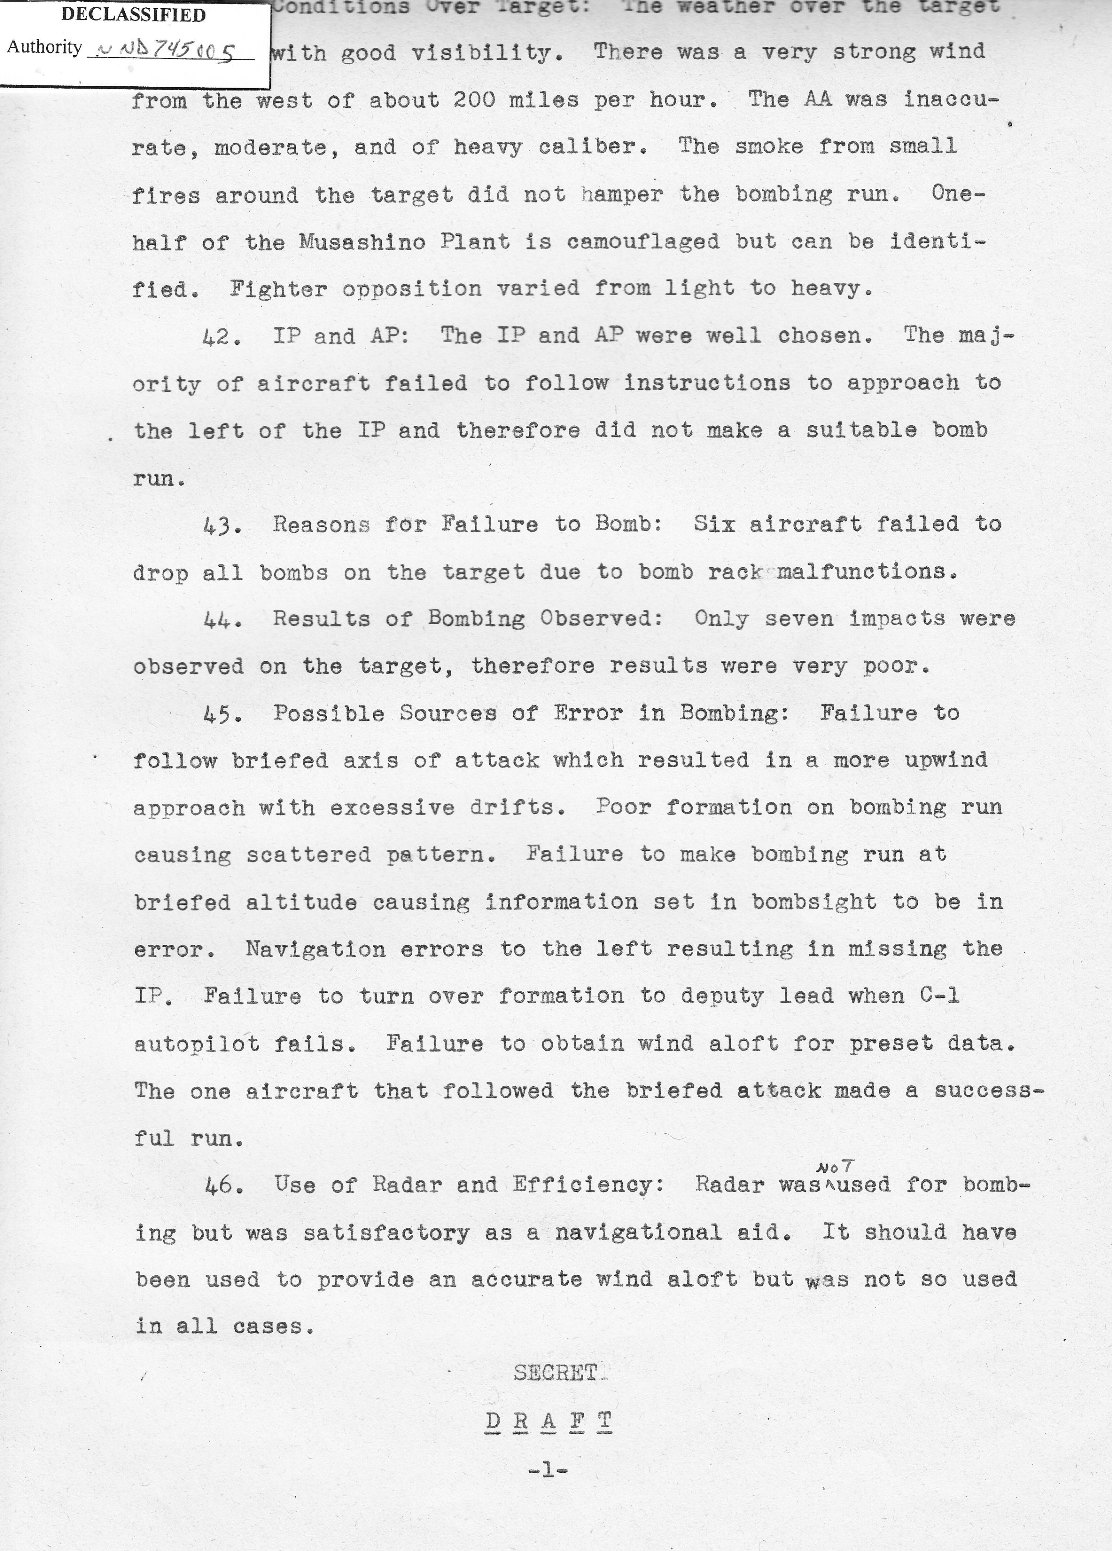
The format of the first two pages, Bombing Data,
is similar to the Tactical Narrative Report
in Page 5.
The focus here is mistakes made during the mission.
Paragraphs 42-45 concentrate on the reasons causing
the poor bombing of Target 357.
**************
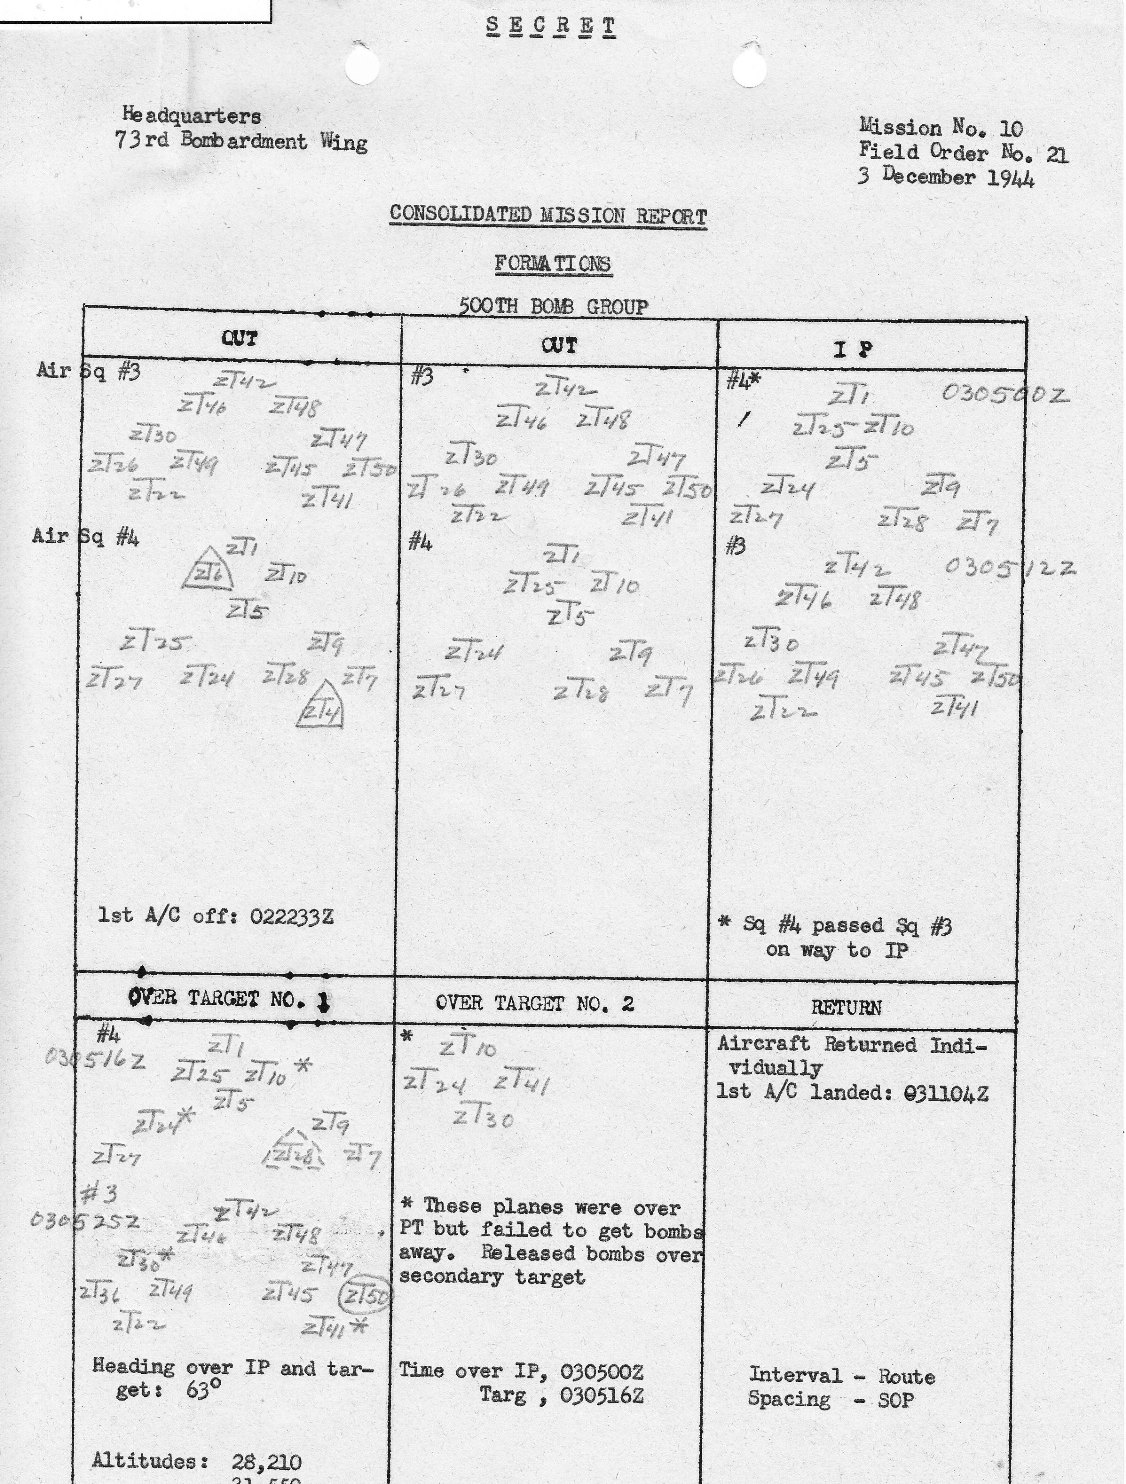
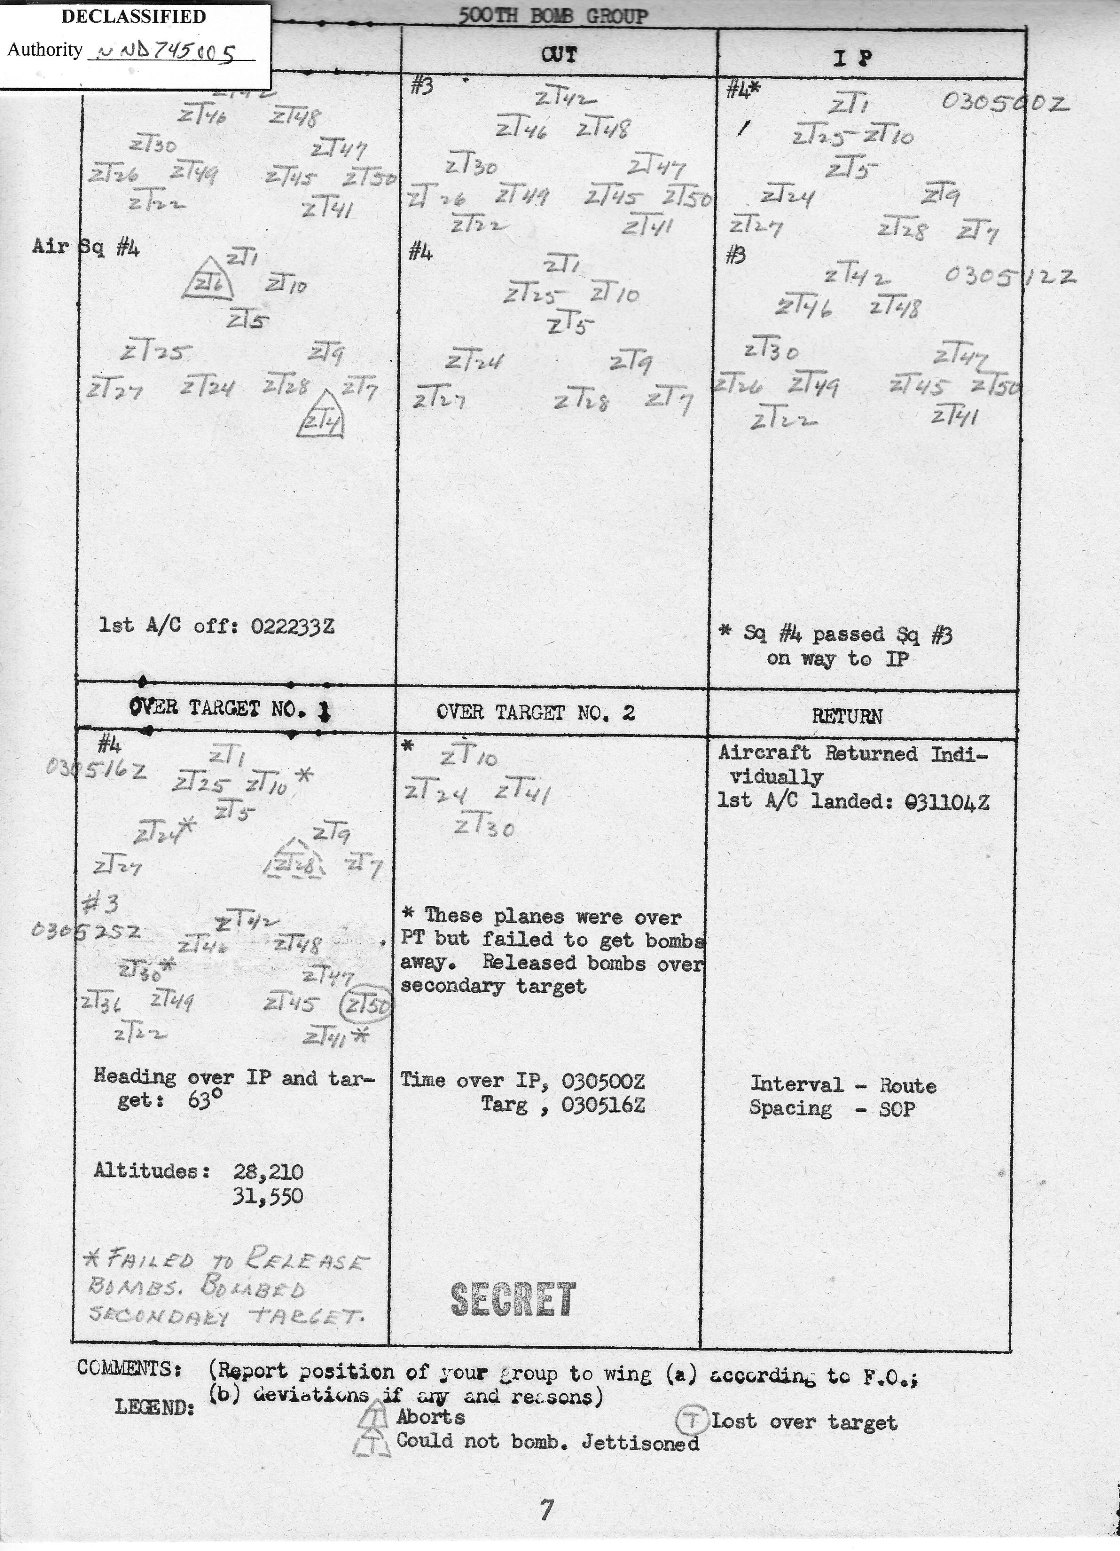
Next is the 500th Bomb Group formation diagram.
This is split into the top and bottom of the page.
Major Goldsworthy was initially Air Squadron #4 behind
Air Squadron #3 in the front formation.
From Jim Bowman's
Day by Day

In the last page are
Triangles and Circles
around some of the B-29s
A Triangle indicates an Abort while
a Circle is for a B-29 lost over the target
BACK TO TOP